Installation and Usage Instructions for Track Lights
1. Track Installation
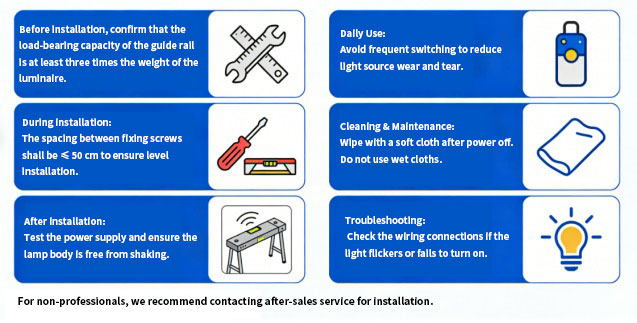
Securely mount the track to the ceiling or wall. Before installation, confirm that the mounting surface has sufficient load-bearing capacity to prevent loosening or falling.
When wiring, clearly distinguish live wire, neutral wire, and ground wire, and ensure firm connections and good insulation to avoid short circuits or electric leakage.
Keep the spacing of fixing screws ≤ 50 cm and ensure the track is level.
2. Light Fixture Installation
Align the lamp connector with the track slot, insert it smoothly, then rotate the lock to fasten.
Ensure the conductive copper sheets of the lamp are in tight contact with the copper strips inside the track to avoid flickering or failure due to poor contact.
After installation, check that the lamp body is stable and free of wobble.
3. Circuit Control
Three wire and four wire tracks support grouped circuit control. Lamps can be divided into different circuits as needed and controlled independently via switches or dimmers for flexible lighting.
4. Dimming Operation
For dimmable track lights, use matching dimming drivers and dimmer switches only. Operate strictly according to the product manual to avoid damaging the lamp.
5. Daily Maintenance
Regularly dust the lamp surface with a dry soft cloth to maintain lighting efficiency.
Do not use wet cloths; avoid long term use in high temperature or humid environments.
Minimize frequent switching to reduce light source loss and extend service life.
If flickering or non lighting occurs, check wiring, connectors, and the driver first.